
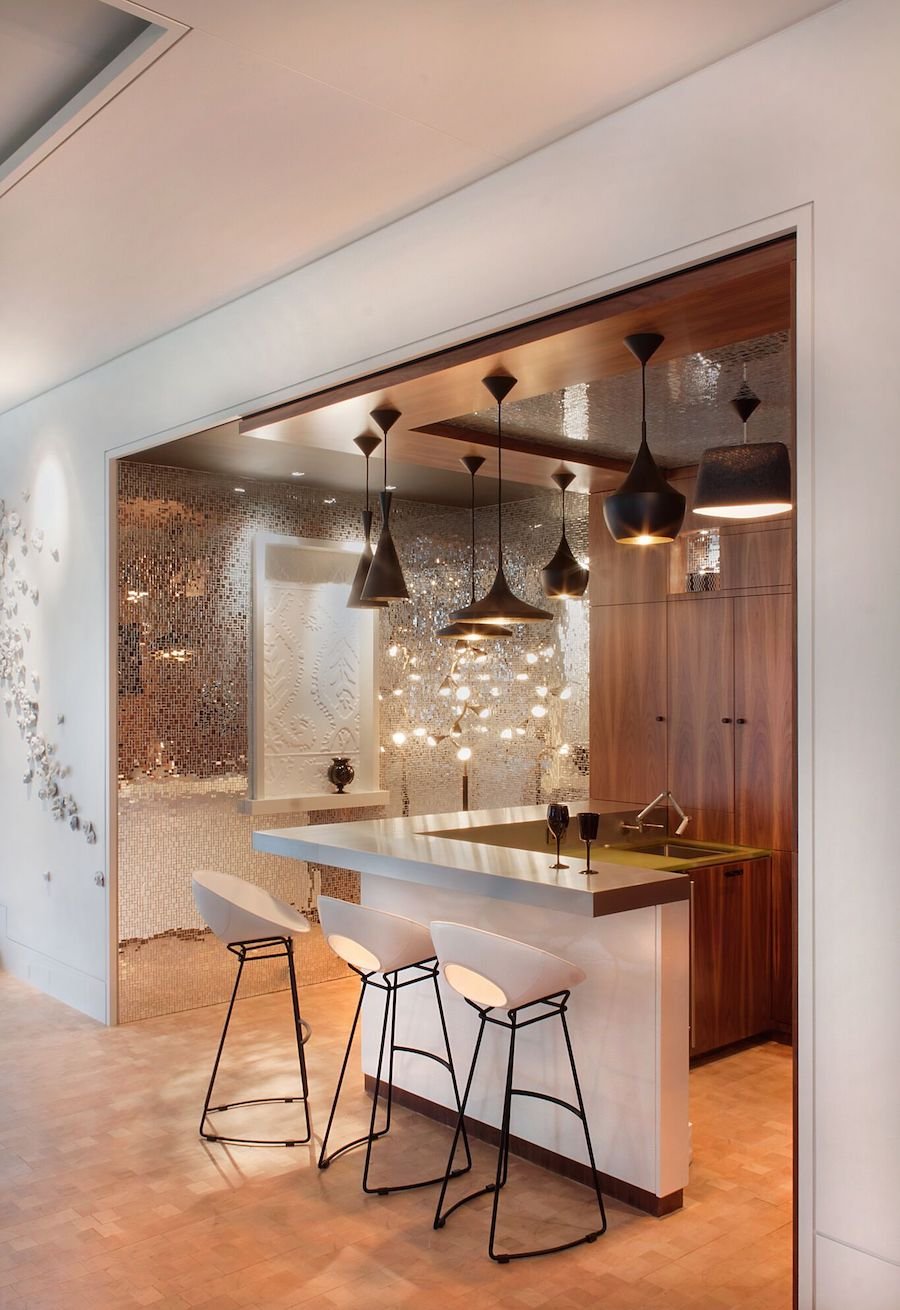
Creating a Bar Area at Home: Location, Furniture, and Wall Decor
Two square meters of floor space. That’s how much a narrow wall-mounted bar takes up—the kind where you drink standing up, once the countertop is placed against the partition. Add two stools and the space needed to walk behind it, and you’re looking at closer to 4 m². The rest of the challenge lies above, on the 2 to 3 m² of wall that almost no one looks at.
In my fifteen years as an interior designer, I’ve seen the same pattern repeat itself: people buy a bar cabinet, plop two stools next to it, and stop there. The result is a cluttered counter and a bare wall. Here’s how to arrange, furnish, decorate, and light a bar area that fits into an existing living room—without any construction work. Let’s start with the location, because everything else follows from there.
Where to Set Up a Bar Area at Home, and How Much Space You Really Need
The location is chosen based on three criteria, in this order: traffic, proximity to a water source or a refrigerator, and the type of wall behind it.
Traffic flow is measured from the edge of the counter, not from the stool. Allow at least 90 cm between the edge of the counter and the wall or piece of furniture across from it so that people can squeeze past someone who is seated, and preferably 110 cm if it’s a true walkway. If the space is less than 80 cm, an occupied stool will block the way.
The third criterion—the wall—seems secondary. It isn't, though; we'll come back to it later.
The table below shows the orders of magnitude I use during the sketching phase. These are industry guidelines, not a standard.
| Configuration | Floor area | Number of people | Storage Capacity |
|---|---|---|---|
| Narrow wall-mounted counter (living room, hallway) | about 2 m² | 1 to 2 standing | Weak on the floor, strong on the wall |
| Counter + 2 stools | about 4 m² | 2 to 3 | Average |
| Corner unit with return and shelves | 5 to 6 m² | 3 to 4 | Strong |
| Kitchen island or central bar (open kitchen) | 8 m² and larger | 4 to 6 | Very strong |
| Rolling Serving Cart (Small Space) | less than 1 m² | 2 | Very low |
The Case of the Open Kitchen
If you have an open-concept kitchen, the bar is already there: it’s either the kitchen island or the extension of the countertop. Don’t add a second piece of furniture three meters away from the first—you’ll just end up walking back and forth twice as much. Instead, add two stools on the living room side and use the nearest wall as storage space.
A Bar Area in a Small Space
If you have less than 2 m² of space, forget about a deep counter. A fold-down wall shelf 30 to 35 cm deep is enough to hold two glasses and a bottle—as long as you drink standing up. The entryway, the landing, the space under the stairs, and the blind spot next to a picture window are the four places I look at first in an apartment. These are wasted spaces.
Furniture: counter, stools, serving cart
A standard bar counter is between 105 and 110 cm high. If your bar is an extension of an existing countertop, the height will likely be around 90 cm, and it’s the stool that needs to be adjusted to fit, not the other way around.
It’s this height that determines everything else: the seat of the stool should be positioned 25 to 30 cm below the countertop, which means 75 to 80 cm for a counter that’s 105–110 cm high. If the gap is less than 25 cm, your thighs will be squeezed and your knees will bump against the counter. Check this before ordering—it’s the most common and most irreversible mistake.
The rest consists of three useful elements:
- The counter. A countertop that’s 30 to 35 cm deep is suitable for standing or as a side table. To actually sit at it, go with a 40–45 cm-high countertop with the supporting cabinet set back: you need room for your knees; otherwise, you’ll bump into the partition.
- Stools. Two are enough. A bar stool with a footrest makes all the difference on a long night out: on a high seat, your legs dangle, and without having to lean on anything, you can get up quickly.
- The serving cart. Preferably a rolling one. It comes out at aperitif time and is then pushed back against the wall.
The choice of materials is just as important for the final look as it is for maintenance. Here’s what I recommend depending on the project.
| Material | Rendering | Maintenance | Relative budget |
|---|---|---|---|
| Solid wood | Warm, develops a patina over time | Oil periodically; avoid exposure to moisture | Medium to high |
| Lacquered Steel | Minimalist or industrial, depending on the finish | Low, damp cloth | Medium |
| Raw Steel | Authentic, with a vibrant patina | Requires protection (wax or light oil); rusts if left unprotected | Medium |
| Glass | Visually light, it makes a small space feel larger | Upper level: everything is visible, gets scratched, and has to be wiped down constantly | Medium |
| Polished concrete | Solid, contemporary | High-maintenance: porous; protection must be reapplied every 6 months to 2 years; does not react well to wine or lemon | High |
| Laminate | Neutral, all styles | Very fragile, but sensitive to heat and water along the edges | Low |
A few words about polished concrete, because it looks so stunning in photos: on a bar countertop, it gets exactly what it hates—wine and lemon juice—which leave rings even on a protected surface. It’s best suited for those who wipe things down immediately. A finely sanded area can be touched up locally, but achieving an invisible repair across the entire surface is another matter entirely.
In my opinion, the combination of wood and metal is still the safest bet: wood on the tabletop (the feel, the warmth, the sound of glasses being set down) and metal on the frame and the wall. It works just as well in a vintage living room as it does in a modern kitchen.
Decorating the Wall: The Storage Solution Everyone Forgets About
That’s where the real potential lies. Above a counter, you typically have 1.50 m of usable height across the entire width of the bar—that’s 2 to 3 m² of usable space on a bar that’s 1.50 to 2 m wide. No one uses this space, even though it’s the area that’s cheapest to outfit and frees up the most counter space.
Three uses to be distributed, from bottom to top:
- From the tray at 1.50 m: what's needed each time. Glasses, an open bottle, the tray.
- From 1.50 to 1.80 m, at eye level: what we display. Bottles with visible labels, the finest pieces in the collection, the item that sets the tone.
- Above 1.80 m: storage space—where we put things we take out twice a year. Don't put anything heavy or fragile up there.
This three-tier rule also applies to glasses. Suspended by their stems beneath a shelf, they take up no floor space and can be rinsed with a single motion. This is the first thing to keep in mind when working with a small space.
When it comes to bottles, the design of the storage solution makes all the difference. A closed rack stores bottles, but you forget what’s inside. An open system with visible labels does the opposite: you can see your wine collection, make quick choices, and the wall becomes a decorative feature of the bar area without needing to hang anything else. Storing bottles on their sides saves space, keeps them securely in place, and makes the labels readable from the front. However, don’t count on this position to “keep the cork moist”: the air trapped under the cork is already saturated with moisture, even when the bottle is standing upright. What protects a wine is a cool, stable temperature, away from light.
Let's just say it right away: a living room wall stays at 19 or 20 °C, with fluctuations between day and night. That's perfect for bottles meant for everyday drinking—the ones you'll finish in a few weeks or months. For long-term aging, you need a wine cellar, not a shelf.
Which wall can support what?
- Solid concrete, stone, solid brick: the best substrate for a cantilevered load—one that pulls downward and outward. Use anchors suitable for the material.
- Hollow brick, aerated concrete, plasterboard: hollow and brittle. Use anchors designed for hollow materials or chemical anchors, and drill without hammer action; otherwise, the facing will come loose.
- Solid wood, 22 mm OSB, wood panel: excellent substrate, provided you fasten into the structure and not just the facing.
- Drywall on a stud frame: the critical point. A single drywall panel alone cannot adequately support an overhang. Even with good expansion anchors, limit the load to no more than about 15 kilograms per mounting point, and use multiple mounting points: the lever arm of a loaded shelf quickly increases the load. Two reliable solutions: screw into the studs of the framing, or install a 22-mm MDF or OSB reinforcement panel behind the shelf.
- Honeycomb partition: Avoid using it for anything heavy.
Before drilling, check twice—not just once. Locate the load-bearing structure, and identify what runs through it: electrical conduits and pipes. A multifunction detector (for studs, metal, and live wires) costs about the same as two bottles of wine. It will save you from having to repair the plaster—and much worse.
One last tip that applies everywhere: check the weight capacity specified by the mount’s manufacturer—in kilograms—and weigh whatever you plan to place on it. A full 75 cl bottle weighs more than one kilogram.
On this point, I’m not impartial: that’s exactly the frustration that led me to design the Wine Line® system . A 2-mm-thick steel wall-mounted rack, 118 cm high × 30 cm wide × 14.8 cm deep, that holds bottles across a 30-cm-wide section, including magnums. The shelves clip into place and can be repositioned without tools, which means you don’t have to take everything apart when your collection changes.
A Wine Line® module is 30 cm wide and 14.8 cm deep, with a weight capacity of 25 kg per module. It can be installed in less than 5 minutes on wood or OSB using the included drilling template, by a single person. 2-year warranty.
Arrange Your Bottle DisplayIf wine is your go-to drink and you want to take things a step further (capacity, storage, bottle sizes), this article on setting up a real wine bar at home goes into detail.
Lighting and Ambience
A dimly lit bar area doesn't exist at night, and that's when it's in use. Three sources, never just one:
- Task lighting: two low-hanging pendant lights above the counter, or an adjustable track light. They define the space better than a rug.
- Wall backlighting: LED strip under the shelves, warm light around 2700 K. Note that the scale is counterintuitive: the lower the value in kelvins, the warmer the light. And to ensure that the labels and glassware look their best, aim for a color rendering index (CRI) above 90.
- A focal point: a neon light, a wall sconce, or simply a bottle placed just right in the beam of light.
As for colors, a dark shade behind the bar (deep green, midnight blue, matte black) makes the glassware and stainless steel stand out by contrast. I find white a bit bland in that spot. And if you put down a rug, keep it outside the area where you set down glasses. It’ll end up stained.
Accessories that are actually useful, and those that just gather dust
Let's just be honest: that twelve-piece cocktail-making kit I got for Christmas is going to end up in a closet. I've seen it all too many times. The shaker comes out two or three times a year, the measuring cup stays in its box, and the chrome-plated paraphernalia takes up space on the counter all year round.
What really works in practice:
- Beautiful glassware, in small quantities. Six high-quality stemmed glasses are better than twenty-four mismatched ones. This is the only category where I recommend spending your budget.
- A decent ice bucket. It holds water, it’s insulated, and it sits on the wood without leaving marks.
- A tray. It carries the appetizers to the living room and clears the counter in one easy motion.
- A sommelier's corkscrew. Just one, kept in the same place, always.
The rest (coasters, a carafe, a slate, a lighted sign) are decorative, not functional. Accept that and use them sparingly: one striking piece is better than ten trinkets lined up in a row.
Mistakes to Avoid When Setting Up a Bar Area
- Miscalculating the height. The counter and stools should be chosen together, not six months apart.
- Blocking the flow of traffic. An occupied stool takes up about 60 cm from the edge of the counter. If getting past it becomes a hassle, no one will sit there.
- Drilling without knowing what's behind the wall— whether it's the wall studs, cables, or pipes. Improper use of drywall is a common cause of shelves eventually sagging.
- Loading beyond the weight limit. A wall of bottles is heavy. Count in kilograms, not in the number of units.
- Set up the bar facing due south. Direct light—especially UV rays—deteriorates the wine (this is known as “light-induced off-flavors”) and fades the labels. Choose an interior wall instead.
- Leave the wall for last. It’s the wall that determines how much counter space you’ll have.
Frequently Asked Questions
What is the ideal height for a home bar counter?
Allow 105 to 110 cm for a true bar counter, with a stool seat that’s 25 to 30 cm lower—that is, 75 to 80 cm. If the bar is an extension of a countertop, the height will be 90 cm, and you’ll need a lower stool.
How much space do you need to set up a bar area?
As a rough guide: about 2 m² of floor space for a narrow wall-mounted counter where you stand to drink; about 4 m² once you add two stools and space for walking behind them; and 8 m² or more for a central island. If you have less than 2 m², opt for a fold-down shelf and move the storage to the wall.
What materials should you choose for a home bar?
Wood for the tabletop (warmth, patina); metal for the frame and wall mounts. Glass makes a small space feel more open, but it scratches easily and requires constant wiping. Polished concrete is beautiful but high-maintenance: because it’s porous, it doesn’t hold up well against wine and lemon, and its protective coating needs to be reapplied every 6 months to 2 years.
Can you hang bottles on a drywall wall?
Yes, provided you secure it to the studs or add a 22-mm MDF or OSB reinforcement panel, and increase the number of fastening points. A single drywall panel cannot effectively support a forward-pulling load: about 15 kilograms per fastening point, no more.
How do you set up a bar area in a small living room?
Make use of a blind spot or a narrow section of wall; install a shelf 30 to 35 cm deep for standing use; store glasses and bottles vertically; and choose a rolling cart instead of a second fixed piece of furniture.
Do you need a water source for a bar area?
No. A bucket, a tray, and a cloth are all you need in most homes. A water fountain is only useful if you regularly serve more than six people.
One last piece of advice—and this is the first thing I tell people during a consultation: Measure your wall before you buy the countertop. Not the other way around.
A wine collection that grows at your own pace.
Modular wall-mounted shelves in raw or lacquered steel. Holds up to 22 bottles per module, 2-year warranty, free shipping on orders over €350.
Explore the collectionExcessive alcohol consumption is harmful to your health. Please drink responsibly.