
Mounting a wine rack on drywall: What Really Stays in Place
25 kg. That’s the maximum load a Wine Line® module can hold when fully stocked, and it’s the only number that matters when your wall is made of drywall. Most installation guides sidestep the issue: they refer to a “heavy load” without ever specifying a specific weight in kilograms. That doesn’t help anyone. The right question concerns the wall itself, and it can be summed up in a single line: Can this partition support 25 kg distributed over a depth of nearly 15 cm—in other words, a load that pulls downward and forward? Depending on what’s behind the drywall, the answer ranges from a flat no to an unconditional yes.
Table of Contents
- A loaded module weighs 25 kg when attached to your partition
- Three Questions to Ask Yourself Before Drilling
- What Each Binding Can Actually Handle
- Case 1: Standard drywall, without reinforcement
- Case 2: Gypsum board with 22 mm MDF or OSB reinforcement
- Case 3: Fastening to a framing stud
- Installation, Step by Step
- Mistakes That Cause a Shelf to Come Loose
- Frequently Asked Questions
A loaded module weighs 25 kg when attached to your partition
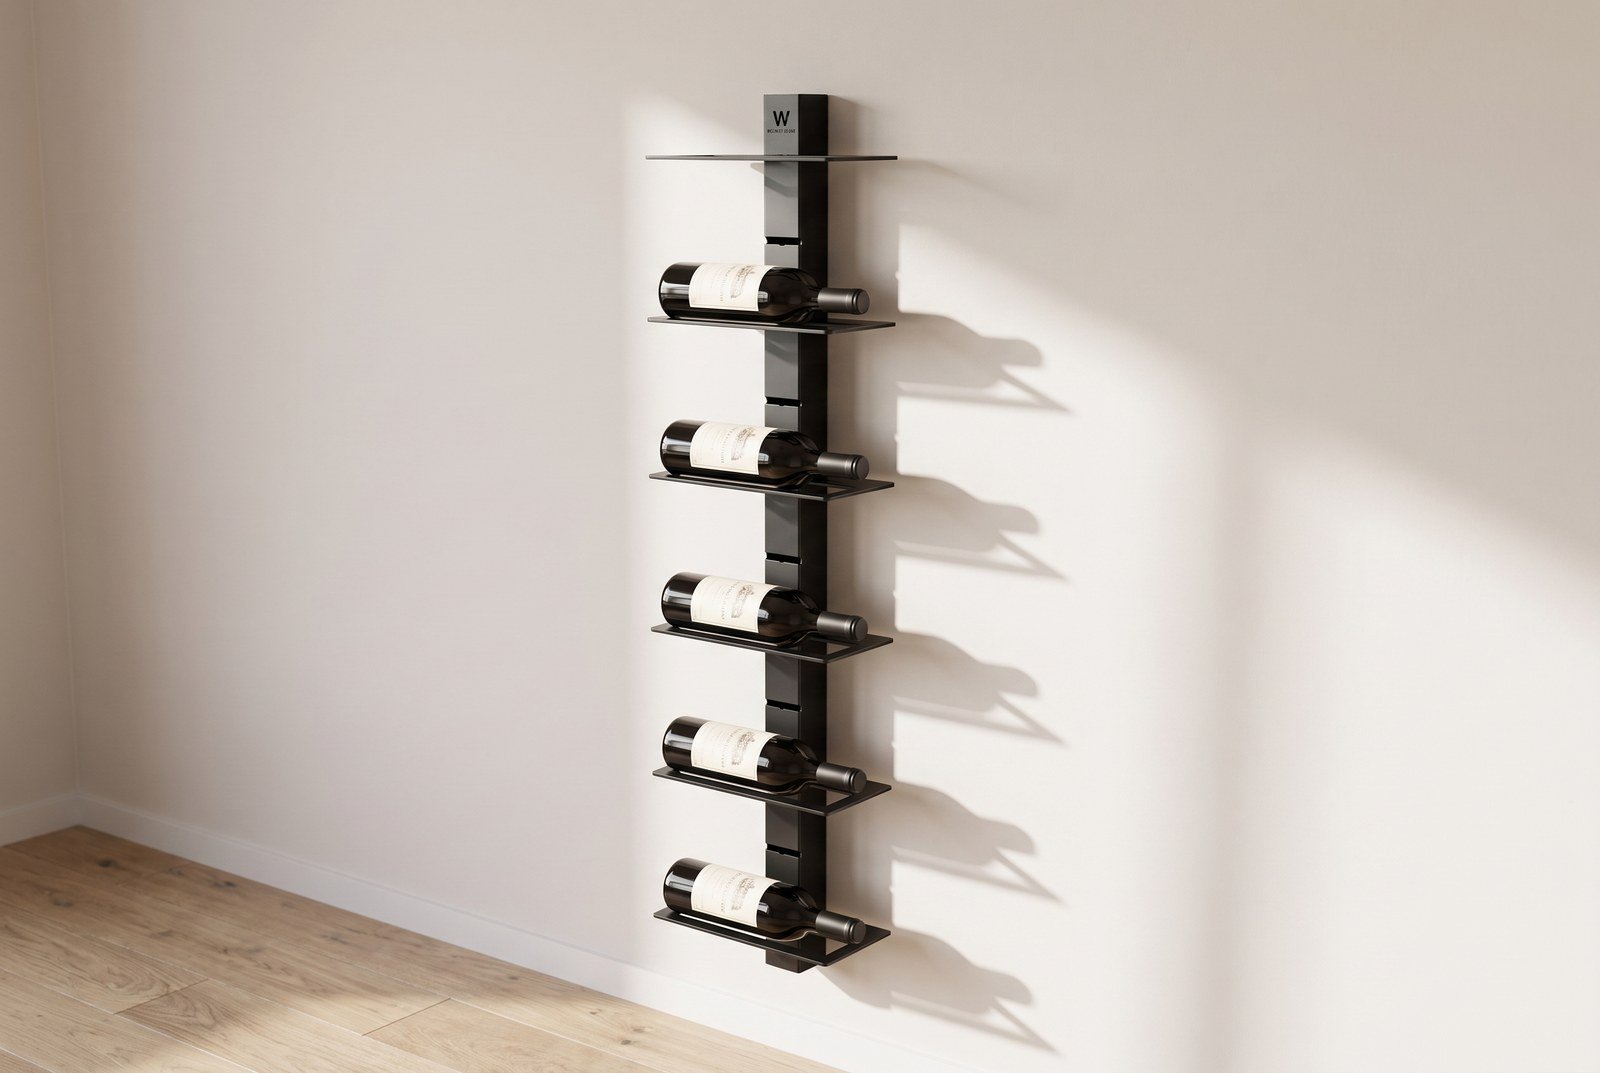
A Wine Line® module measures 118 cm high, 30 cm wide, and 14.8 cm deep, and is made of 2 mm steel. Its maximum load capacity is 25 kg, regardless of bottle size.
These openings are compatible with Bordeaux, Burgundy, magnum, champagne, and spirits, provided the bottle is properly secured.
What matters next is how that load is transmitted to the wall. It pulls downward and forward. A cantilevered wall structure is subjected to uplift at its upper points and shear at its lower points. Drywall withstands the latter fairly well, but the former much less so.
Before choosing a wall anchor, you should check what’s behind the plate. And if the wall doesn’t inspire much confidence, it’s worth taking two minutes to weigh the pros and cons of wall-mounted versus floor-standing storage.
Three Questions to Ask Yourself Before Drilling
A 30-second diagnostic check before installation can save you from having to make a repair.
1. What kind of wall is behind you, and how thick is it?
Three configurations cover almost all cases. Drywall on a stud frame: a drywall panel screwed onto tracks and studs, with a cavity behind it. Adhered lining: a panel—usually bonded to an insulation board—glued to the load-bearing wall using adhesive mortar dots. The solid wall is indeed there, but it may be located 4 to 12 cm behind the facing, with compressible insulation in between (the FAQ explains the method for this scenario). And the exposed solid wall—concrete, solid brick, or stone—which poses no load-bearing issues, provided it is truly solid: a hollow brick or a hollow concrete block, on the other hand, requires an anchor designed for hollow materials. Also check the thickness: some partitions are fitted with a double layer of sheet, which significantly improves stability.
2. Is there any amount at the location in question, and what is it?
The studs are spaced 40 or 60 cm apart, depending on the job site. A stud finder—or a magnet that picks up screw heads—can locate them in two minutes. Mark their position with a pencil, along with the material: metal studs in almost all recent partitions, and wood in renovation projects, attics, and older partitions. This detail determines the type of fasteners needed; we’ll return to this in Case 3.
3. Are you aiming for the maximum load?
A single module in a streamlined configuration is nothing like two side-by-side, fully equipped structures. Be honest about your two-year plan: with modularity, things add up quickly.
Standard drywall, no usable studs, maximum intended load: in this specific case, go directly to Case 2.
What Each Binding Can Actually Handle
A figure is widely cited on this topic: the Molly anchor is said to withstand 30 kg of pull-out force, and three anchors per bracket would therefore support 90 kg. This is a misinterpretation. The Placo (Saint-Gobain) documentation, which references NF DTU 25.41, states that loads between 10 and 30 kg can be secured to the panels using expansion or toggle anchors suitable for the substrate, provided that a minimum spacing of 40 cm between fastening points is maintained. This 30 kg figure represents the total load limit for the attached object, not the load-bearing capacity per anchor. Siniat, Knauf, Pladur, and the SNIP publish the same text, all based on the same DTU standard. Additionally, in cantilevered applications, the upper and lower attachment points are not subjected to the same stress; therefore, adding up the individual load capacities makes no sense in this context.
As for the 40-cm requirement, it is clearly stated by manufacturers but is almost never mentioned elsewhere. Yet it determines the installation method. On a 30-cm-wide structure, two points on the same line are necessarily less than 40 cm apart. Direct fastening into the panel therefore falls outside the scope of the DTU, which refers to the higher-level method: transferring the load to the framing using a bracing member. This is the installation method described below.
You won’t find any values for the pull-out force per anchor below: the open-source information is too contradictory to be reproduced here. The conclusion is based on the only certain figure: the module’s 25 kg.
| Mounting type | What she puts up with | Compatible wall | The Verdict: Facing 25 kg |
|---|---|---|---|
| Self-drilling nylon anchor | Light loads | Plasterboard only | No |
| Universal nylon anchor (knotted or finned) | Light to medium loads | Hollow material, lining | No |
| Molly-type metal anchor, with its metric screw | Medium to heavy loads, provided there is at least 40 cm of spacing between points | Drywall, model selected based on the thickness of the facing | Restriction: Lightweight configuration only |
| Tilting pin | Medium to heavy loads; permanent installation | Hollow wall with sufficient air space | Limitation: Cannot be removed without causing damage |
| 5 × 50 mm screw in a 22 mm MDF or OSB panel attached to the structure | Distributes the load across the entire surface of the panel | Reinforced drywall, with the panel itself screwed into the studs | Yes, assembly recommended |
| 5 × 50 mm screw in a wood framing stud | Direct connection to the supporting structure | Drywall on Wood Framing (Renovation, Attic) | Yes, the safest |
| Self-tapping screw for metal, or wood reinforcement screwed into several studs | Secured to the framing. The included wood screw is not suitable for this application. | Drywall on a metal frame: the most common scenario | Yes, with the right hardware; reinforcement is recommended |
| Long through-wall anchor, anchored in a load-bearing wall | Facing and insulation transom, anchored in the masonry | Glued-on sheathing, solid wall behind | Yes, if the anchor reaches the support |
A quick note on the invisible-mount floating shelves that are so common in this context: their single rod concentrates all the force at a single point, which makes them very demanding on drywall. A Wine Line® module, on the other hand, distributes the force across several through-holes. Our guide on choosing the right anchor for your surface goes into more detail.
Case 1: Standard drywall, without reinforcement
You have a drywall wall on a stud frame, there are no usable studs at the chosen location, and you're relying solely on Molly anchors.
Verdict: Don’t aim for 25 kg. This setup is designed for a lightweight configuration, and you have to accept it as such. The gypsum board struggles under tension at the high points, which is precisely its weakness. Added to this is the minimum spacing of 40 cm between points, which is out of reach horizontally on a 30-cm-wide structure.
Alexandre Antoine, who founded Wine Line® after fifteen years in interior design, puts it bluntly: a bare drywall wall and a collectible storage unit aren’t a good long-term match. The instances of items falling off that he’s observed never happen on the day of installation, but months later, when the load has doubled without anyone realizing it.
If you continue to use this setup, leave a clear margin and check the fastenings twice a year.
Case 2: Gypsum board with 22 mm MDF or OSB reinforcement
This is the installation method we recommend for single-layer drywall, and it provides the best solution to the issue of load-bearing capacity.
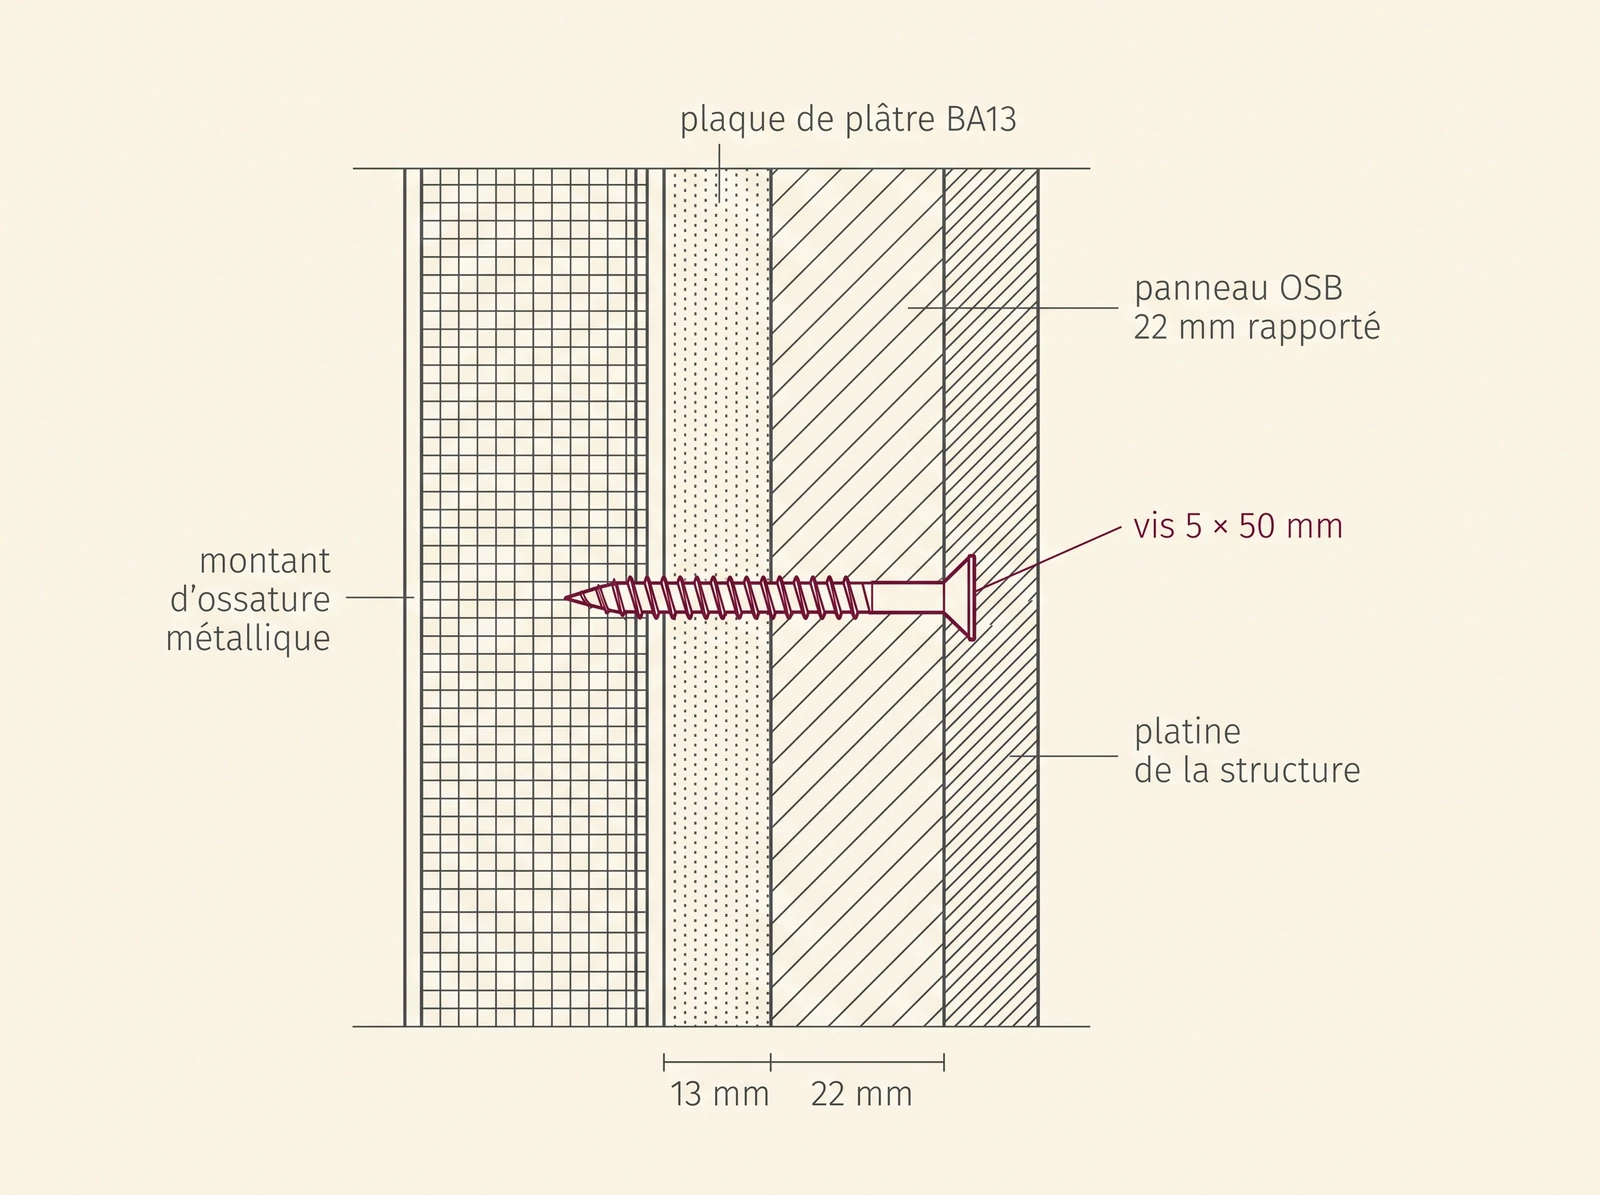
Here’s how it works: You attach a 22-mm-thick MDF or OSB panel to the drywall, then secure the module to that panel. Instead of concentrating the 25 kg on just a few anchors, the load is distributed across the entire surface of the panel, which in turn redistributes it to its own anchors. This panel must be screwed into the studs: that’s the whole point of this installation, since the load is transferred to the structure rather than the drywall. Alternatively, two vertical battens screwed into the studs will do the same job using less material.
Verdict: Yes, even under full load, as long as the panel is anchored to the frame. This is also the only installation method that allows you to reposition or expand the setup later, since the panel can accommodate a screw almost anywhere.
In terms of appearance, a panel painted to match the wall blends in with the bottles. Unfinished OSB complements the raw steel and its slightly bluish-gray patina quite well. This reinforcement applies to the entire range of steel modules, whether they have a raw or lacquered finish.
Case 3: Fastening to a framing stud
Drilling into a stud and screwing into it is still the safest—and fastest—solution. There is one condition, however: the fasteners must be appropriate for the type of stud.
On a wood-frame structure, the included 5 × 50 mm screw passes through the siding and secures directly into the stud. This is the ideal—and simplest—scenario.
On a metal frame—the standard scenario—this same screw is not suitable. The profile is 6-tenths of a millimeter thick: a 5-mm wood screw finds no grip there; it distorts the sheet metal, and its hold becomes unpredictable. There are two possible solutions. A self-tapping screw for metal, or—for a load of this magnitude—a wooden or OSB reinforcement piece screwed into several studs. This second option brings us back to Case 2, and it is the one we prefer.
The top rail and the bottom rail, on the other hand, won't be of any use to you: they're horizontal and poorly positioned to support a cantilevered load.
Verdict: Yes, this is the go-to setup when the geometry allows it, provided the fasteners are compatible with the frame.
There is one limitation that must be stated frankly. The studs are spaced 40 or 60 cm apart, the drilling template has its own spacing, and there’s no guarantee that they’ll align at the chosen location. Shift the structure a few centimeters to align at least the main points, or go back to Case 2. A vertical batten screwed into two adjacent studs also solves the problem.
Never force a screw in at an angle to make up for a missed hole. The screw will become unstable, and the hole will get bigger with each attempt.
Installation, Step by Step
One person is all it takes. It takes less than five minutes on wood or OSB, and less than ten minutes on concrete. On drywall, allow a little more time to mark the location.
Equipment:
- Material detector, preferably a combined metal and voltage model
- Carpenter's pencil, tape measure, spirit level (at least 60 cm long)
- A drill/driver, to be used in drill-only mode, and a set of drill bits
- Expansion pliers and hammer, for metal anchors
- Anchors designed for the specific substrate, with their own fasteners: the metric screws for the Molly anchors are not interchangeable with the wood screws included with the module
- The drilling template and 5 × 50 mm screws included with the module
Six steps, in order.
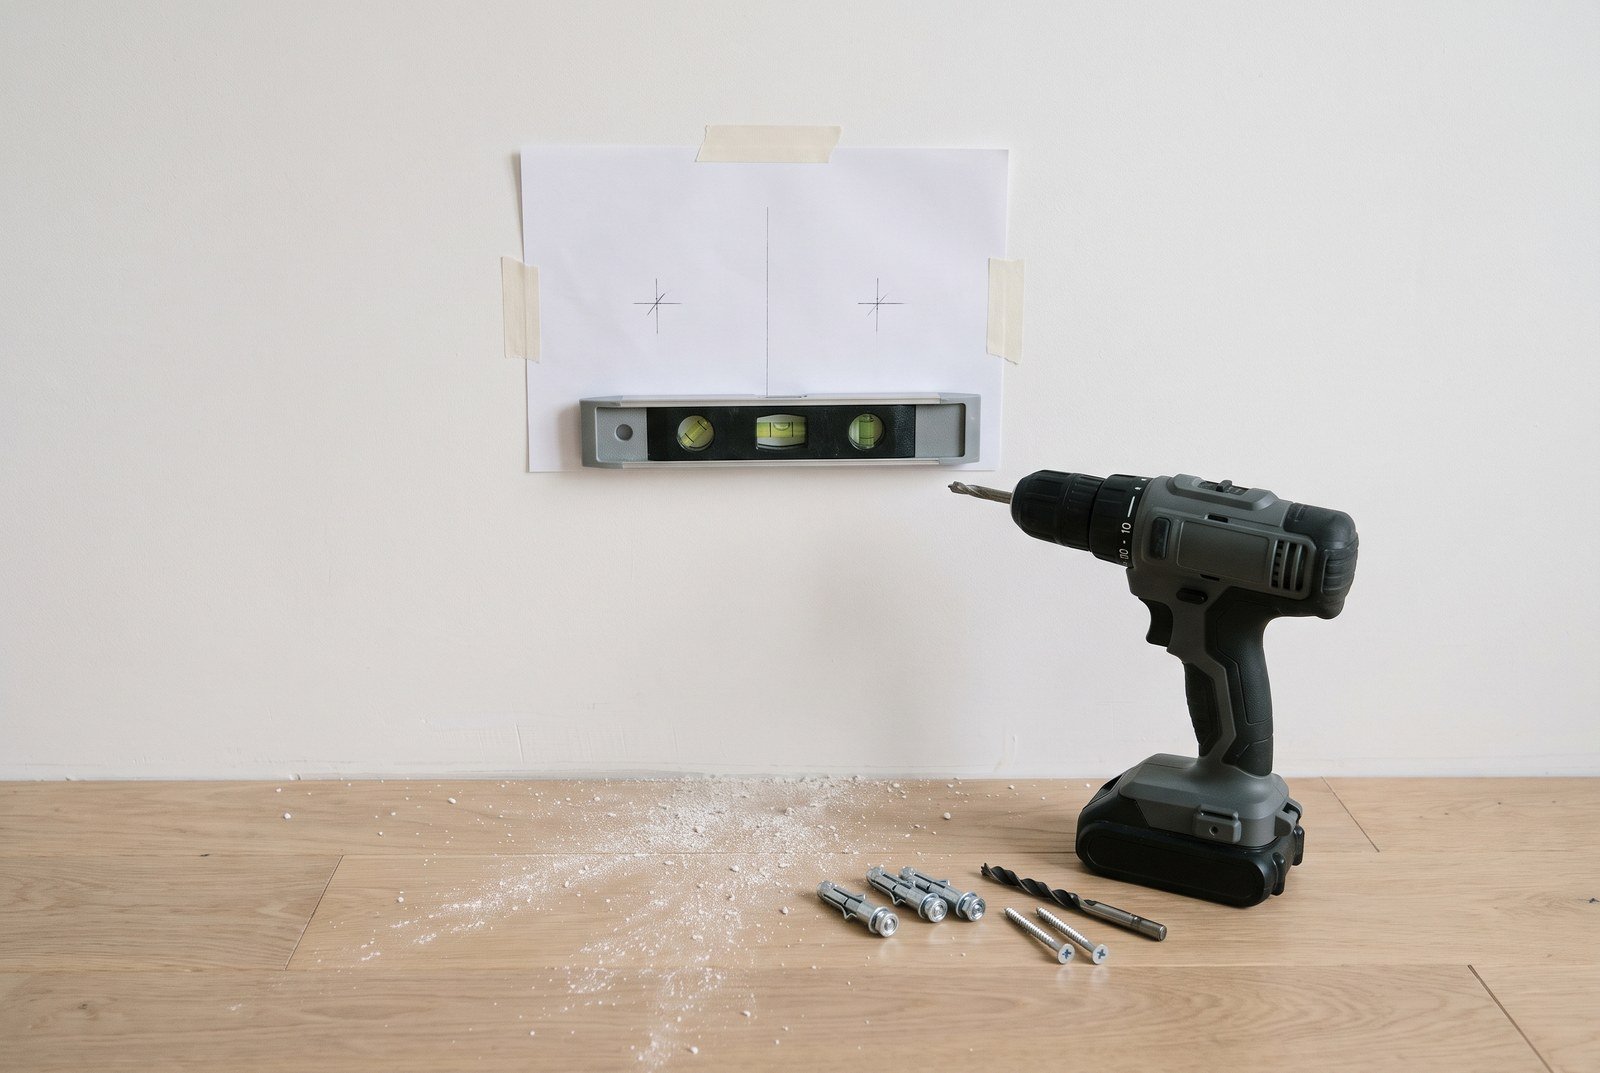
- Locate and mark. Run the detector over the entire area to locate studs and joists, as well as live wires and pipes. If you’re unsure near an outlet or light switch, turn off the circuit breaker before drilling. Next, place the Wine Line® drilling template on the wall, check it with a level, and then mark the points. For height guidelines, see our article on the recommended installation height for a wall-mounted bottle rack.
- Choose the drill bit. Its diameter should match the body of the anchor, not the screw. If the diameter is too large, the anchor will spin in its hole. Set the drill to non-hammer mode: never use the hammer setting on drywall, as it will cause the paper to tear.
- Drill slowly and perpendicular to the surface. Don't apply pressure—the drill will do the work. Drilling at an angle enlarges the hole on the face side and compromises the anchor's hold.
- Insert the expansion anchor using pliers. Push the Molly in until the flange lies completely flat. Press down the two anti-rotation tabs located under the flange with a sharp tap of a hammer on the screw head: without them, the anchor will rotate in the hole and will not expand. Then expand the anchor using pliers—never a power drill—as excessive force will tear the facing. This step determines how securely the anchor holds.
- Screw it in using the screw that comes with the mounting bracket. For Molly anchors: Remove the metric screw from the anchor once it has expanded, position the module, then screw the same screw back in. For MDF, OSB, or wooden studs: Use the supplied 5 × 50 mm screws. In both cases, tighten gradually, alternating from one point to the next, as you would with a wheel. Stop as soon as the mounting plate is flush against the surface.
- Check, then load. Use a level to check the installed structure, then gradually add weight, starting from the bottom. Clip the shelves into place, fill them, and schedule a follow-up check one week later.
It is included with each module and available for download; you don’t need to mark any dimensions on the wall. Our comprehensive installation guide provides step-by-step instructions for mounting each bracket, from concrete to 22-mm OSB.
Mistakes That Cause a Shelf to Come Loose
Undersized anchors. An anchor that came with another piece of furniture is not the right one for this. The model should be chosen based on the thickness of the facing, and a Molly anchor that is too short will not expand properly.
Drilling too close to an edge. A few centimeters from a corner, a recessed electrical box, or a cutout in the sheet metal, the material is missing around the hole. Move the location.
Mounting points are too close together. The minimum spacing of 40 cm also applies between two adjacent brackets or two modules placed side by side.
Installation without a level. A crossbar module distributes the load unevenly among its attachment points, causing the bottles to slide toward the lower side. The imbalance worsens as you fill it.
Gradual overloading. The most common—and most insidious—mistake. You set up the unit with a light load, add shelves, switch to magnum bottles, and before you know it, you’ve reached 25 kg without any warning.
Frequently Asked Questions
Can a module be mounted on water-resistant drywall?
Yes. Water-resistant drywall can be drilled and anchored just like standard drywall, and its mechanical strength is comparable. Pay closer attention to the finish: untreated steel develops a patina and can rust in persistently damp environments. In a laundry room or damp basement, choose powder-coated steel, as its finish provides much better protection for the metal. Make sure there are no deep scratches that expose the steel, as that’s where corrosion begins.
What about using polystyrene as insulation on the back?
This situation calls for caution. The anchor passes through the facing and then into the insulation, a material that offers no grip. There are two reliable solutions: screw into the studs of the framing, or use long anchors that pass through the insulation to anchor into the load-bearing wall.
What if the wall is tiled?
Drill with a tile bit, using the non-hammer mode, starting very slowly on a marking sticker so the bit doesn’t slip. Choose the anchor based on the total thickness, including the tile: select a longer model than you would for bare wall surfaces.
How do you fill in a botched screw hole?
For a hole less than one centimeter in size, a patching compound is sufficient—preferably in powder form rather than paste if the hole goes all the way through, since the paste shrinks as it dries. For a larger hole, especially after removing an expanded Molly plug, the patching compound alone will collapse inward. First, apply a self-adhesive aluminum repair patch, or glue a rectangle of drywall to a batten slid in behind it, then apply the filler in two crisscrossed coats.
Should you check the fasteners after installation?
Yes, twice. An initial inspection one week after installation, once the load has stabilized, and then a follow-up inspection every six months. You’ll be looking for a screw that has become loose or a dowel flange that has sunk into the cladding.
A wine collection that grows at your own pace.
Modular wall-mounted shelves in raw or lacquered steel. Holds up to 22 bottles per module, 2-year warranty, free shipping on orders over €350.
Explore the collectionExcessive alcohol consumption is harmful to your health. Please drink responsibly.